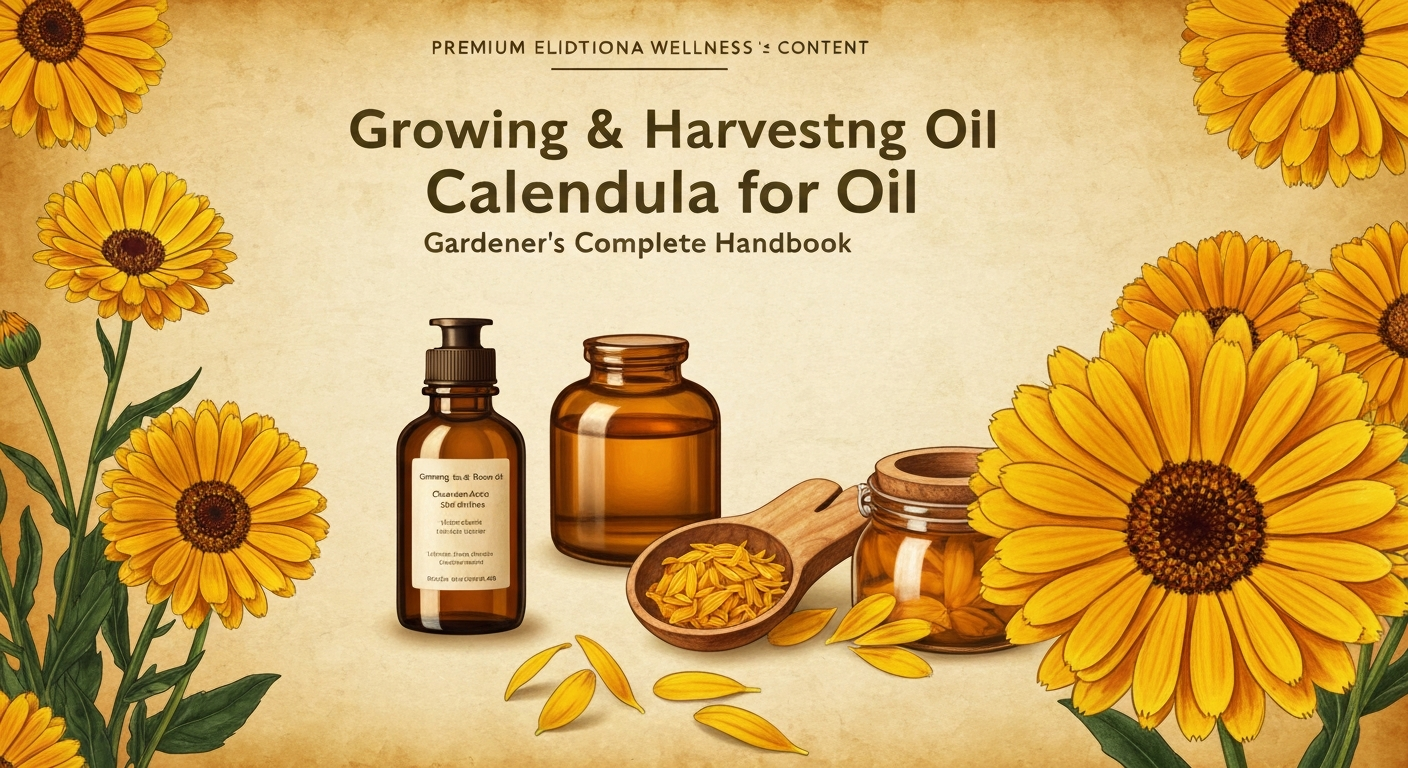
Growing & Harvesting Calendula for Oil: Gardener's Complete Handbook
Key Takeaways
- Calendula (Calendula officinalis) is easy to grow from seed and thrives in cool weather
- Plant in well-draining soil with full sun to partial shade for optimal flower production
- Regular harvesting of flowers encourages continuous blooming throughout the season
- Peak harvest time is mid-morning when flowers are fully open and dry
- Proper drying and storage techniques preserve flower quality for oil-making
- Companion planting and succession sowing maximize your calendula garden yield
Table of Contents
- Understanding Calendula: The Golden Garden Healer
- Planning Your Calendula Garden
- Planting and Growing Calendula
- Garden Care and Maintenance
- Harvesting Techniques for Maximum Potency
- Post-Harvest Processing and Storage
- Troubleshooting Common Growing Challenges
- Maximizing Your Garden's Productivity
Understanding Calendula: The Golden Garden Healer
Calendula officinalis, commonly known as pot marigold, stands as one of the most rewarding flowers to grow for oil production. This hardy annual has graced gardens for centuries, prized not only for its vibrant golden blooms but also for its reputation in traditional botanical practices. Understanding this remarkable plant forms the foundation of successful calendula cultivation.
Botanical Characteristics
Calendula belongs to the Asteraceae family, sharing lineage with daisies and sunflowers. The plant typically reaches heights of 12 to 24 inches, producing sturdy stems adorned with lance-shaped, slightly sticky leaves. The flower heads, ranging from pale yellow to deep orange, consist of numerous petals radiating from a central disc—each bloom a concentrated source of the compounds that make calendula oil so valued.
What sets calendula apart from ornamental marigolds (Tagetes species) is its softer, more delicate appearance and its long history of traditional use. The flowers contain various naturally occurring compounds including flavonoids, carotenoids, and triterpenes, which contribute to the oil's characteristic golden color and properties.
Growing Season and Climate Preferences
Calendula thrives as a cool-season annual, preferring temperatures between 55°F and 70°F. This makes it an excellent choice for spring and fall gardening in most climates. In regions with mild winters, calendula can even bloom year-round, providing a steady supply of flowers for oil production.
The plant's cold tolerance is remarkable—it can withstand light frosts that would damage many other flowering plants. This resilience, combined with its tendency to self-seed, makes calendula a reliable addition to any organic calendula garden focused on sustainable practices.
Planning Your Calendula Garden
Successful calendula cultivation begins with thoughtful planning. The decisions you make before planting will significantly impact your flower yield and, ultimately, the quality of oil you can produce.
Site Selection and Soil Requirements
Choose a location that receives full sun to partial shade—calendula is remarkably adaptable but produces the most abundant blooms with at least six hours of direct sunlight daily. In extremely hot climates, afternoon shade can actually benefit the plants by preventing stress during peak heat.
Soil preparation is crucial for a thriving calendula garden. The ideal soil should be:
- Well-draining with a pH between 6.0 and 7.0
- Rich in organic matter but not overly fertile
- Loose and crumbly to accommodate the plant's taproot system
- Free from standing water or compacted areas
Interestingly, calendula often produces more flowers in moderately fertile soil rather than extremely rich conditions. Over-fertilization can lead to lush foliage at the expense of bloom production—counterproductive when your goal is harvesting calendula flowers.
Garden Layout and Spacing
Plan your garden layout with both aesthetics and functionality in mind. Calendula plants should be spaced 8 to 12 inches apart to allow for proper air circulation and easy harvesting access. Consider creating dedicated beds or rows specifically for your calendula garden, as this makes maintenance and harvesting more efficient.
For oil production purposes, calculate that you'll need approximately 20-30 mature plants to yield enough flowers for regular oil-making sessions. This assumes you'll be harvesting flowers every few days during peak season and want to maintain a steady supply for how to make calendula oil projects.
Variety Selection for Oil Production
While all calendula varieties can be used for oil-making, some are particularly well-suited for this purpose:
| Variety | Flower Size | Color | Oil Production Notes |
|---|---|---|---|
| Pacific Beauty | Large (3-4") | Mixed orange/yellow | High petal count, excellent yield |
| Resina | Medium (2-3") | Deep orange | High resin content, sticky flowers |
| Orange King | Large (3") | Bright orange | Prolific bloomer, easy to harvest |
| Lemon Queen | Medium (2-3") | Pale yellow | Mild color, good for light oils |
Planting and Growing Calendula
Growing calendula from seed is straightforward and economical, allowing you to cultivate large quantities of plants for substantial flower harvests. The key lies in timing your plantings and providing optimal growing conditions from the start.
Seed Starting Techniques
Calendula seeds are relatively large and easy to handle, making them beginner-friendly for both direct sowing and indoor starting. The seeds have a distinctive curved shape and can remain viable for several years when stored properly.
Indoor Seed Starting:
Begin seeds indoors 6-8 weeks before your last expected frost date. Use seed-starting trays filled with quality potting mix, planting seeds ¼ inch deep. Maintain soil temperature between 60-70°F for optimal germination, which typically occurs within 7-14 days.
Keep seedlings in bright light—a sunny windowsill or grow lights work well. Once seedlings develop their second set of true leaves, they're ready for transplanting outdoors after hardening off.
Direct Sowing:
Direct sowing is often preferred for calendula, as the plants don't particularly enjoy root disturbance. Sow seeds directly in the garden 2-4 weeks before your last frost date. Plant seeds ¼ to ½ inch deep, spacing them 4-6 inches apart initially.
Thin seedlings to final spacing once they're 2-3 inches tall. The removed seedlings can often be transplanted elsewhere or added to salads as edible flowers.
Transplanting and Establishment
When transplanting indoor-started seedlings, choose an overcast day or late afternoon to minimize transplant shock. Dig holes slightly larger than the root ball and water thoroughly after planting. Space transplants according to your planned garden layout, typically 8-12 inches apart for mature plants.
Newly transplanted calendula may appear slightly wilted for the first day or two—this is normal. Keep soil consistently moist but not waterlogged during the establishment period, which usually lasts 1-2 weeks.
Succession Planting Strategy
To ensure a continuous supply of fresh flowers for oil production, implement succession planting throughout the growing season. Make new sowings every 2-3 weeks from early spring through late summer in most climates.
This staggered approach provides several advantages:
- Consistent flower production rather than feast-or-famine harvests
- Extended harvesting season spanning several months
- Insurance against weather-related crop losses
- Ability to time harvests around your oil-making schedule
Garden Care and Maintenance
Maintaining a productive calendula garden requires attention to watering, fertility, and ongoing care practices that promote continuous flower production throughout the season.
Watering Requirements and Techniques
Calendula prefers consistent moisture but is surprisingly drought-tolerant once established. The key is avoiding both drought stress and waterlogged conditions, either of which can reduce flower production and quality.
Optimal Watering Practices:
- Water deeply but less frequently to encourage strong root development
- Apply 1-1.5 inches of water per week, including rainfall
- Water at the base of plants to keep foliage dry and support overall wellness
- Use mulch to maintain soil moisture and suppress weeds
Morning watering is ideal, as it allows foliage to dry quickly while providing plants with moisture for the day ahead. Avoid overhead watering in the evening, which can promote fungal diseases.
Fertilization for Flower Production
Calendula's fertilization needs are modest—over-fertilization often results in lush foliage but fewer flowers. A balanced approach supports both plant health and abundant blooming.
Fertilization Schedule:
- Apply compost or well-rotted manure to beds before planting
- Side-dress with compost mid-season if plants appear pale
- Use a balanced, low-nitrogen fertilizer (such as 5-10-10) sparingly
- Avoid high-nitrogen fertilizers that promote leaf growth over flowers
Organic gardeners often find that calendula thrives with minimal intervention, particularly in soils previously amended with compost or other organic matter.
Deadheading and Pruning
Regular deadheading is essential for maintaining continuous flower production in your calendula garden. This practice redirects the plant's energy from seed production back to creating new blooms.
Remove spent flowers every few days, cutting stems back to the next flower bud or leaf node. This frequent harvesting actually serves dual purposes—you collect flowers for oil production while encouraging the plant to produce more blooms.
If plants become leggy or overgrown, pinch back the growing tips to encourage bushier growth and more flower production. This is particularly effective early in the season when plants are establishing themselves.
Companion Planting
Strategically chosen companion plants can enhance your calendula garden's productivity and health. Consider these beneficial partnerships:
Beneficial Companions:
- Herbs: Basil, oregano, and thyme help repel harmful insects
- Vegetables: Tomatoes, peppers, and brassicas benefit from calendula's pest-deterrent properties
- Flowers: Nasturtiums and marigolds create a diverse, pest-confusing environment
- Beneficial insect attractors: Dill, fennel, and other umbellifers draw helpful predatory insects
Avoid planting calendula near black walnut trees, as these trees produce compounds that can inhibit calendula growth.
Harvesting Techniques for Maximum Potency
Mastering the art of harvesting calendula flowers is crucial for producing high-quality oil. Timing, technique, and handling all influence the final product's characteristics and potency.
Optimal Harvest Timing
The timing of your harvest significantly impacts the quality of flowers you'll use for oil production. Understanding when flowers are at their peak ensures you capture the maximum concentration of beneficial compounds.
Daily Timing:
Harvest calendula flowers in mid to late morning, after dew has evaporated but before the heat of the day. This timing ensures flowers are dry to the touch while still fresh and fully hydrated. Avoid harvesting during or immediately after rain, as wet flowers can develop mold during the drying process.
Flower Maturity:
Select flowers that are fully open but not yet showing signs of decline. The ideal flower should have:
- Petals that are vibrant in color and feel substantial
- A fresh, slightly resinous scent
- No browning or wilting at petal edges
- Petals that feel slightly sticky to the touch
Avoid flowers that are just beginning to open or those that are past their prime, as these won't contribute optimally to your oil's quality.
Proper Harvesting Techniques
Use clean, sharp scissors or pruning shears to harvest calendula flowers. Cut stems about 1-2 inches below the flower head, which provides a handle for processing while removing the flower cleanly from the plant.
Harvesting Method:
- Approach plants early in the morning when conditions are optimal
- Select only the best quality, fully opened flowers
- Cut stems cleanly without damaging surrounding buds
- Place harvested flowers immediately in a basket or breathable container
- Avoid crushing or compacting flowers during collection
Work systematically through your calendula garden, harvesting from different plants rather than stripping one plant completely. This approach maintains the garden's appearance while ensuring continued flower production.
Frequency and Quantity Guidelines
Regular harvesting encourages continued blooming, making it possible to collect flowers every 2-3 days during peak season. A well-established plant can produce 20-30 flowers per week under optimal conditions.
For calendula oil recipe projects, plan to harvest approximately:
- 1-2 cups of fresh flowers for small batches (8-16 oz oil)
- 4-6 cups of fresh flowers for larger batches (32 oz oil)
- Adjust quantities based on your preferred flower-to-oil ratio
Handling and Transportation
Proper handling maintains flower quality from garden to processing. Use shallow baskets or trays that allow flowers to lie in a single layer without crushing. Avoid plastic bags or containers that trap moisture and can cause flowers to deteriorate rapidly.
Process harvested flowers as quickly as possible after collection. If immediate processing isn't possible, store flowers in a cool, dry location with good air circulation for no more than a few hours.
Post-Harvest Processing and Storage
The period immediately following harvest is critical for maintaining flower quality and preparing calendula for oil production. Proper processing and storage techniques preserve the flowers' beneficial compounds and prevent spoilage.
Cleaning and Preparation
Before drying or using fresh flowers for oil-making, inspect and clean your harvest carefully. Remove any damaged petals, insects, or debris that may have been collected during harvesting.
Cleaning Process:
- Spread flowers on a clean, flat surface for inspection
- Remove any insects, leaves, or damaged petals
- Gently shake flowers to dislodge loose debris
- Avoid washing with water unless absolutely necessary
- Sort flowers by size and quality if making multiple batches
If washing becomes necessary due to dust or soil contamination, rinse flowers very gently in cool water and allow them to dry completely before processing further.
Drying Techniques for Long-term Storage
While fresh flowers can be used immediately for oil-making, drying allows you to preserve your harvest for future use and creates a shelf-stable ingredient for year-round oil production.
Air Drying Method:
Spread flowers in a single layer on screens, clean cloth, or paper towels in a warm, dry, well-ventilated area away from direct sunlight. Turn flowers daily to ensure even drying. Complete drying typically takes 5-7 days, depending on humidity and air circulation.
Dehydrator Method:
Use a food dehydrator set to its lowest temperature setting (95-105°F) to speed the drying process while preserving flower quality. Arrange flowers on dehydrator trays in single layers and dry for 8-12 hours, checking periodically.
Oven Drying (Emergency Only):
If necessary, use an oven set to its lowest temperature with the door slightly ajar. This method requires constant attention to prevent overheating and should only be used when other options aren't available.
Storage Solutions
Properly dried calendula flowers can be stored for up to one year while maintaining quality for oil production. Storage conditions significantly impact longevity and potency.
Optimal Storage Conditions:
- Cool, dry location away from direct light
- Airtight containers such as glass jars or sealed bags
- Consistent temperature below 70°F
- Low humidity environment (below 60% relative humidity)
Label containers with harvest date and variety information. Check stored flowers periodically for signs of moisture or mold, which indicate storage conditions need adjustment.
Quality Assessment
Well-preserved calendula flowers should retain their color, scent, and structural integrity. Quality indicators include:
- Vibrant orange or yellow coloration
- Fresh, slightly resinous scent
- Petals that maintain their shape without crumbling
- No signs of mold, discoloration, or musty odors
Flowers that have lost their color, developed off-odors, or become excessively brittle should be discarded rather than used for oil production.
Troubleshooting Common Growing Challenges
Even experienced gardeners encounter challenges when growing calendula. Understanding common problems and their solutions helps maintain a productive calendula garden throughout the season.
Pest Management
Calendula is generally pest-resistant, but several insects can occasionally cause problems. Early identification and appropriate management keep pest issues from affecting your flower harvest.
Common Pests and Solutions:
Aphids: These small, soft-bodied insects cluster on new growth and flower buds. Manage with:
- Strong water sprays to dislodge insects
- Beneficial insects like ladybugs and lacewings
- Insecticidal soap applied according to label directions
- Companion planting with aphid-repelling herbs
Spider Mites: These tiny pests cause stippling and webbing on leaves. Prevention and control include:
- Maintaining adequate soil moisture to reduce plant stress
- Increasing humidity around plants
- Predatory mites for biological control
- Horticultural oils applied during cooler parts of the day
Slugs and Snails: These mollusks can damage young plants and flowers. Management strategies:
- Hand-picking during evening hours
- Copper barriers around garden beds
- Diatomaceous earth applied around plants
- Beer traps placed strategically in the garden
Disease Prevention and Management
Fungal diseases pose the greatest threat to calendula plants, particularly in humid conditions or when plants are stressed. Prevention is more effective than approach for most calendula diseases.
Powdery Mildew: This white, powdery coating on leaves reduces plant vigor and flower production.
- Ensure adequate air circulation between plants
- Avoid overhead watering, especially in evening
- Apply preventive fungicidal sprays early in the season
- Remove affected plant parts promptly
Downy Mildew: Yellow patches on upper leaf surfaces with fuzzy growth underneath.
- Improve drainage and reduce humidity around plants
- Space plants appropriately for air circulation
- Water at soil level rather than on foliage
- Apply copper-based fungicides if necessary
Environmental Stress Solutions
Environmental conditions can significantly impact calendula performance and flower production. Understanding how to modify growing conditions helps overcome these challenges.
Heat Stress: High temperatures can cause reduced flowering and plant decline.
- Provide afternoon shade in extremely hot climates
- Increase watering frequency during heat waves
- Apply mulch to keep soil cool and moist
- Time plantings for cooler seasons
Poor Flowering: When plants produce abundant foliage but few flowers:
- Reduce nitrogen fertilization
- Increase phosphorus availability in soil
- Ensure adequate sunlight (minimum 6 hours daily)
- Check for overcrowding and improve spacing
Soil and Nutrition Issues
Soil problems can manifest in various ways, from poor germination to reduced flower quality. Regular soil testing and appropriate amendments address most nutrition-related issues.
pH Imbalances:
- Test soil pH annually and adjust as needed
- Add lime to raise pH in acidic soils
- Add sulfur or organic matter to lower pH in alkaline soils
- Use pH-appropriate fertilizers to maintain balance
Drainage Problems:
- Amend heavy soils with compost and coarse sand
- Create raised beds in areas with poor drainage
- Install drainage tiles in chronically wet areas
- Select alternative planting sites if drainage can't be improved
Maximizing Your Garden's Productivity
Creating a highly productive calendula garden requires strategic planning and implementation of advanced techniques that extend the growing season and maximize flower yield per square foot.
Season Extension Techniques
Extending your growing season allows for longer harvesting periods and greater total flower production. Several techniques can help you achieve this goal.
Cold Protection Methods:
- Row covers or frost cloth to protect plants during light frosts
- Cold frames for extending fall and winter growing
- Greenhouse growing for year-round production in cold climates
- Succession planting to maintain continuous harvests
Heat Protection Strategies:
- Shade cloth (30-50%) during extreme summer heat
- Companion planting with taller plants for natural shade
- Mulching heavily to keep soil cool
- Strategic timing of plantings for optimal growing conditions
Intensive Growing Methods
Maximize flower production per square foot through intensive gardening techniques that increase plant density while maintaining plant health.
Square Foot Gardening:
Plant calendula in 4-inch squares within a square-foot grid system. This method allows for 9 plants per square foot when using compact varieties, significantly increasing yield in small spaces.
Container Growing:
Large containers (minimum 12-inch diameter) can produce substantial flower harvests while allowing mobility for optimal growing conditions. Benefits include:
- Precise control over soil conditions and drainage
- Ability to move plants for optimal light and temperature
- Extended growing season through protected cultivation
- Easier pest and disease management
Seed Saving and Selection
Developing your own seed stock allows you to select for characteristics that enhance oil production while reducing long-term costs.
Selection Criteria for Oil Production:
- Plants with the highest flower production rates
- Flowers with the most substantial petal structure
- Plants showing disease resistance and environmental adaptability
- Varieties with the deepest color and strongest resinous qualities
Seed Saving Process:
- Allow selected flowers to mature fully and develop seed heads
- Harvest seeds when they turn brown and feel dry
- Clean seeds by removing chaff and debris
- Store seeds in cool, dry conditions with proper labeling
- Test germination rates before next season's planting
Record Keeping and Garden Optimization
Maintaining detailed records helps optimize your calendula garden over time by identifying the most successful varieties, planting times, and management practices.
Essential Records to Maintain:
- Planting dates and germination rates for different varieties
- Flower production quantities and timing
- Weather conditions and their impact on plant performance
- Pest and disease occurrences and management effectiveness
- Soil amendments and their effects on plant growth
Yield Optimization Strategies:
- Compare performance of different varieties under your conditions
- Identify optimal planting windows for maximum flower production
- Adjust spacing and cultural practices based on results
- Develop customized fertilization schedules for your soil and climate
Planning for Oil Production
Coordinate your garden planning with your oil-making schedule to ensure optimal timing and flower quality. Consider factors such as:
- Harvest timing relative to when you plan to process flowers
- Quantities needed for different oil-making projects
- Storage requirements if not processing immediately
- Succession planting to match oil production schedules
By implementing these advanced techniques and maintaining detailed records, your calendula garden can become increasingly productive over time, providing abundant flowers for all your oil-making needs while serving as a beautiful and beneficial addition to your landscape.
The journey from seed to golden oil begins in the garden, where careful attention to growing conditions, harvesting techniques, and plant care translates directly into the quality of your final product. Whether you're cultivating a small container garden or managing extensive beds, the principles outlined in this guide will help you achieve success in growing calendula for oil production.