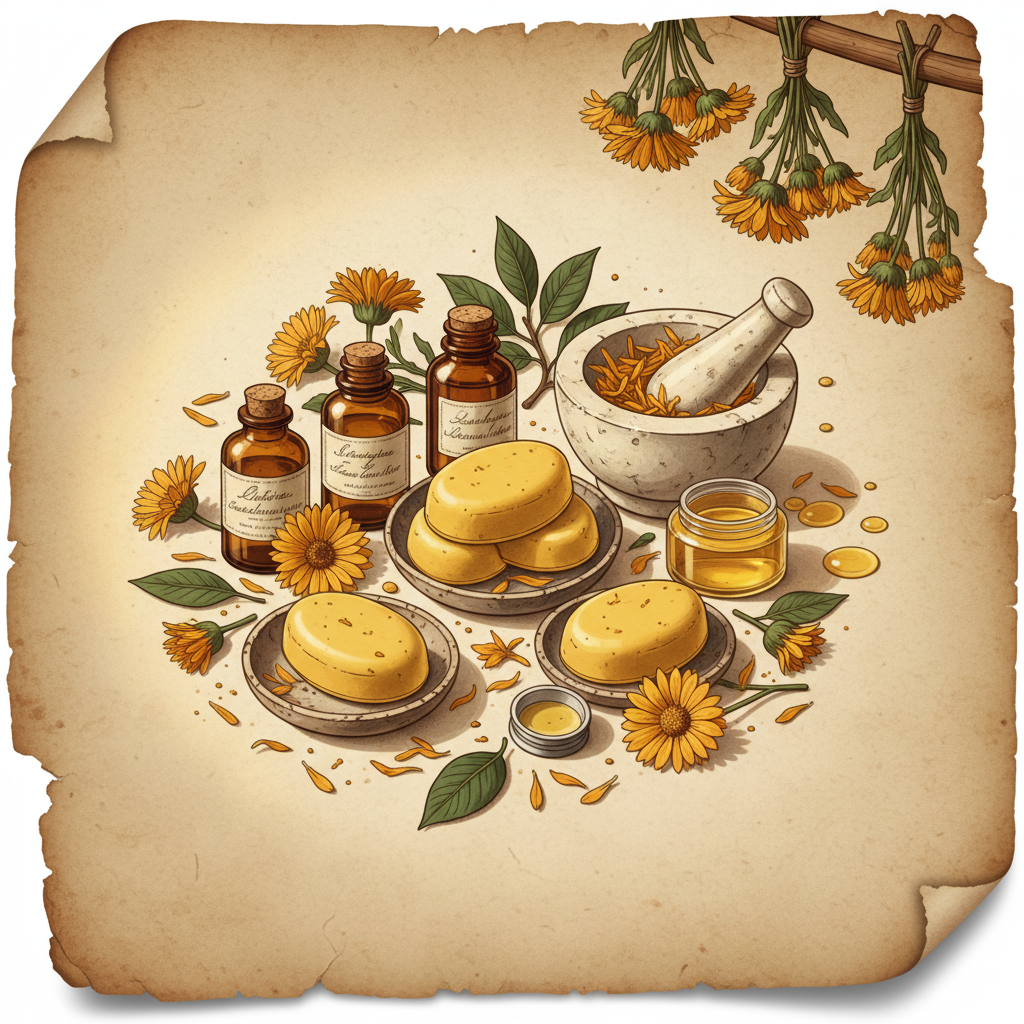
How to Make Calendula Oil Lotion Bars for Travel
There's something wonderfully satisfying about creating your own skincare products, especially when they're as practical and travel-friendly as calendula oil lotion bars. These solid moisturizers have become increasingly popular among natural skincare enthusiasts who appreciate their convenience, portability, and the gentle properties that calendula oil traditionally brings to formulations.
Unlike liquid lotions that can leak or be restricted by airline regulations, lotion bars offer a mess-free solution that fits perfectly in your carry-on bag. When combined with calendula oil's time-honored reputation in traditional skincare practices, these bars may help support skin comfort during travel's often harsh conditions.
Understanding Calendula Oil in Lotion Bar Formulations
Before diving into our recipe, it's worth understanding why calendula oil has earned its place in countless DIY calendula recipes. This golden oil, extracted from the vibrant petals of Calendula officinalis, has been traditionally used in various skincare applications for centuries. People often report that formulations containing calendula oil may help promote a sense of skin comfort and smoothness.
In lotion bar formulations, calendula oil serves as both a conditioning agent and a way to incorporate the flower's traditional benefits into a solid, portable form. The oil blends beautifully with the butters and waxes that give lotion bars their structure, creating a product that melts gently against warm skin.
Essential Materials and Ingredients
Creating professional-quality calendula oil lotion bars requires careful attention to ingredient selection and proportions. Here's everything you'll need for this project:
Base Ingredients
- Pure calendula oil - 2 tablespoons (30ml)
- Coconut oil - 3 tablespoons (45ml), refined or unrefined
- Shea butter - 3 tablespoons (45ml), raw or refined
- Beeswax pellets - 2 tablespoons (30ml) or candelilla wax for vegan option
- Cocoa butter - 1 tablespoon (15ml), optional but recommended for hardness
Optional Enhancement Ingredients
- Vitamin E oil - 1/2 teaspoon (acts as natural preservative)
- Essential oils - 10-15 drops total (lavender, chamomile, or geranium work beautifully with calendula)
- Arrowroot powder - 1 teaspoon (reduces greasiness)
Equipment Needed
- Double boiler or makeshift version using a glass bowl over simmering water
- Silicone lotion bar molds, soap molds, or small containers
- Glass measuring cups
- Wooden stirring spoon
- Small whisk (optional)
- Kitchen scale for precise measurements (recommended)
- Labels for finished products
Step-by-Step Instructions
Step 1: Prepare Your Workspace
Set up your double boiler system and ensure all equipment is completely clean and dry. Any water contamination can affect the shelf life of your finished lotion bars. Arrange your molds on a flat surface where they won't be disturbed during cooling. If using essential oils, have them measured and ready, as timing will be important once you remove the mixture from heat.
Step 2: Measure Hard Ingredients
Begin by measuring your beeswax and cocoa butter (if using). These will take the longest to melt, so they go in first. Place them in your glass measuring cup or the top of your double boiler. The precision of measurements is crucial for achieving the right consistency – too little wax results in soft bars that may melt in warm weather, while too much creates bars that are difficult to apply.
Step 3: Begin Melting Process
With water simmering gently in the bottom of your double boiler, place the wax and cocoa butter mixture over the heat. Stir occasionally with your wooden spoon. The melting process should be gentle – avoid high heat which can degrade the beneficial properties of your ingredients. This step typically takes 5-7 minutes.
Step 4: Add Butter and Oils
Once the waxes are about 75% melted, add your shea butter and coconut oil. Continue stirring until everything is completely melted and well combined. The mixture should appear uniform and golden. Add your calendula oil for skin applications last among the oils, stirring gently to incorporate.
Step 5: Temperature Management
Remove the mixture from heat and allow it to cool slightly – about 2-3 minutes. The temperature should be warm but not hot to the touch. This cooling period is important because adding essential oils to a mixture that's too hot will cause the volatile compounds to evaporate, reducing their aromatic properties.
Step 6: Add Final Ingredients
If using vitamin E oil, add it now along with any essential oils you've chosen. Stir gently but thoroughly to ensure even distribution. If including arrowroot powder, whisk it in carefully to avoid lumps. Work quickly but calmly – the mixture will begin to thicken as it cools.
Step 7: Pour Into Molds
Working efficiently, pour the mixture into your prepared molds. Fill each mold completely but avoid overflow. Give each mold a gentle tap on the counter to release any air bubbles that might have formed during pouring. The mixture should have a smooth, even surface.
Step 8: Cooling and Setting
Allow the lotion bars to cool at room temperature for at least 2 hours, though overnight cooling is ideal. Avoid refrigerating unless your kitchen is extremely warm, as rapid cooling can cause the bars to crack or develop an uneven texture. You'll know they're ready when they're firm to the touch and easily release from the molds.
Step 9: Unmolding and Finishing
Carefully remove your calendula oil lotion bars from their molds. They should release easily if properly cooled. If they seem soft or leave residue on your fingers, allow additional cooling time. Once unmolded, wrap each bar individually in parchment paper or store in small tins to prevent them from sticking together.
Troubleshooting Common Issues
Bars Too Soft or Greasy
This usually indicates insufficient wax content or too much liquid oil. For future batches, increase beeswax by 1/2 tablespoon or add a teaspoon of arrowroot powder to absorb excess oils. Soft bars may still be usable but will require more careful storage.
Bars Too Hard to Apply
Excessive wax content creates this problem. The bars should soften with body heat and gentle pressure. If they remain stubbornly hard, you can remelt the batch and add an additional tablespoon of shea butter or coconut oil.
Grainy Texture
This often occurs when shea butter or coconut oil cools too quickly or unevenly. To prevent graininess, ensure thorough melting and mixing, and allow gradual cooling at room temperature. Some natural variation in texture is normal and doesn't affect functionality.
Storage and Travel Considerations
Proper storage extends the life of your DIY calendula lotion bars and maintains their quality during travel. Store completed bars in a cool, dry place away from direct sunlight. Small metal tins work excellently for travel, protecting the bars while allowing easy access.
For air travel, these solid bars comply with TSA regulations since they're not liquid. However, be mindful of temperature – leaving them in a hot car or direct sunlight can cause melting. During summer travel or in warm climates, consider packing them in an insulated section of your luggage.
Usage and Application Tips
To use your calendula oil lotion bars, simply warm the bar between your palms or rub it directly on the skin area needing moisture. The bar will soften with body heat, allowing for easy application. A little goes a long way – start with light pressure and build up coverage as needed.
These bars work particularly well on areas prone to dryness during travel: elbows, knees, and hands that face frequent washing. Some people report that the calendula oil component may help promote a sense of comfort for skin that feels tight or uncomfortable from airplane air or climate changes.
Similar to other calendula oil body butter formulations, these bars are best applied to slightly damp skin to enhance absorption and spread.
Safety Considerations and Patch Testing
Important Safety Note: Before using any new skincare product, including homemade formulations, perform a patch test. Apply a small amount to the inside of your wrist or elbow and wait 24-48 hours to check for any adverse reactions.
While calendula is generally well-tolerated, individuals with allergies to plants in the Asteraceae family (including ragweed, chrysanthemums, or daisies) should exercise caution. If you're pregnant, nursing, or have sensitive skin conditions, consult with a qualified healthcare provider before use.
Essential oils, if used, should always be properly diluted. The recipe above maintains safe dilution ratios, but never increase essential oil quantities without research into safe usage levels.
Customization and Variations
Once you've mastered the basic recipe, consider these variations to customize your calendula oil lotion bars:
For Extra Dry Skin
Increase shea butter to 4 tablespoons and add 1 tablespoon of mango butter. This creates a richer, more emollient bar that may help support very dry or weathered skin.
For Oily or Acne-Prone Skin
Replace coconut oil with fractionated coconut oil or jojoba oil, both of which are less likely to clog pores. Reduce overall oil content slightly and increase arrowroot powder to 1 1/2 teaspoons.
Vegan Version
Substitute candelilla wax for beeswax using a 1:1 ratio. Candelilla wax is slightly harder than beeswax, so you may need to reduce the amount slightly or increase butter content for the right consistency.
Expected Results and Realistic Outcomes
When properly made, calendula oil lotion bars should provide several weeks to months of moisturizing support, depending on usage frequency. Users often report that these bars may help promote a sense of skin smoothness and comfort, particularly during travel when skin faces additional environmental stressors.
The bars should have a pleasant, subtle scent from the calendula oil and any added essential oils. They should apply smoothly without leaving a heavy, greasy residue, though some initial oiliness is normal and typically absorbs within minutes.
Shelf life for properly stored bars is typically 6-12 months, with the vitamin E oil helping to prevent rancidity of the other oils. Always discontinue use if you notice any off odors, changes in color, or skin irritation.
Conclusion
Creating your own calendula oil lotion bars offers both practical benefits and the satisfaction of crafting personalized skincare products. These travel-friendly bars combine the traditional skin-supporting properties that calendula oil has been valued for throughout history with the convenience modern travelers require.
With careful attention to measurements, temperature control, and safety considerations, you can create professional-quality lotion bars that may help support skin comfort wherever your travels take you. Remember that everyone's skin is different, and what works well for one person may not work for another. Always consult with a qualified healthcare provider if you have specific skin concerns or conditions.
As you gain confidence with this basic recipe, you'll likely discover your own preferred variations and techniques. The beauty of DIY skincare lies in this customization – creating products tailored specifically to your skin's needs and preferences while incorporating ingredients like calendula oil that have stood the test of time in traditional skincare practices.